PARTS USED:
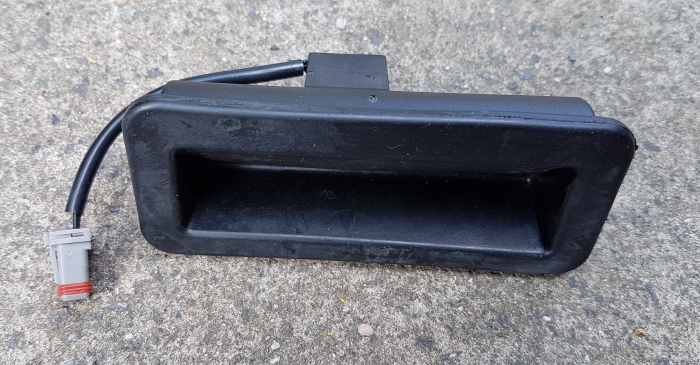
1 x YUZ500020 – Range Rover Sport Tailgate Release Switch Rear Upper
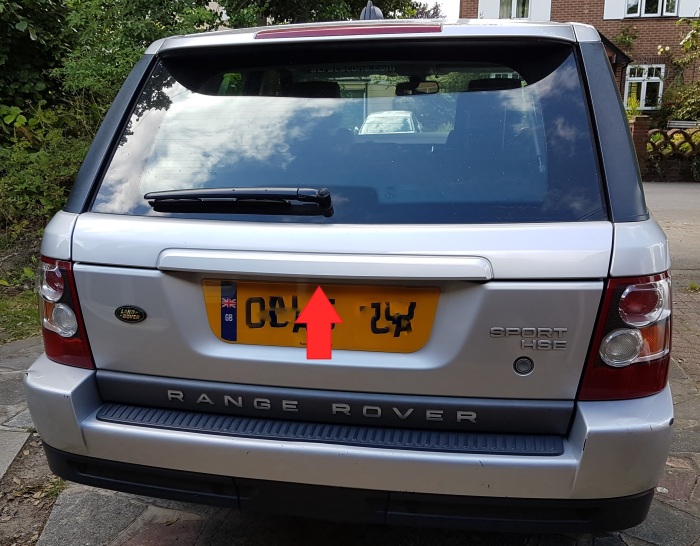
So one morning I ran out to grab something from the boot, unlocking the car on my way out of the front door. I got to the boot and grabbed the upper boot handle, tugging to operate the release and… nothing happened. So I unlocked the car again and… nothing. The full boot opened fine but the glass section was dead.
A number of people have reported this on older cars and it comes down to three possible issues:
- Dead upper switch unit – simple fix.
- Damaged cabling in the upper hinge area – bit of a pain.
- Damaged cabling from the switch to the hinge – nightmare.
So the challenge is how to get into the switch to check the continuity. Just like the number plate lights, you can slide a metal implement into the gap between the ends of the switch and the plastic housing to release the plastic prongs. This is lots of hassle working fairly blind and doesn’t give you much visibility of potential cause (2) above.
The other option is to remove the body panel from the bottom of the upper window glass section that covers the switch area but to do this you need to be able to open the glass section! Chicken and egg situation. Luckily, I tried to open it again a few days later and success! It opened.
In the meantime, I bought a replacement OEM switch unit as the current one is 14 years old and could do with a change anyway (the rubber hand grip area was starting to perish). I got a brand new replacement switch (See top of article for part number) from Amazon Prime next day delivery for £18.99 – It’s about £35-45 plus VAT for a new OEM or Original LR part on all the good spares websites I checked.
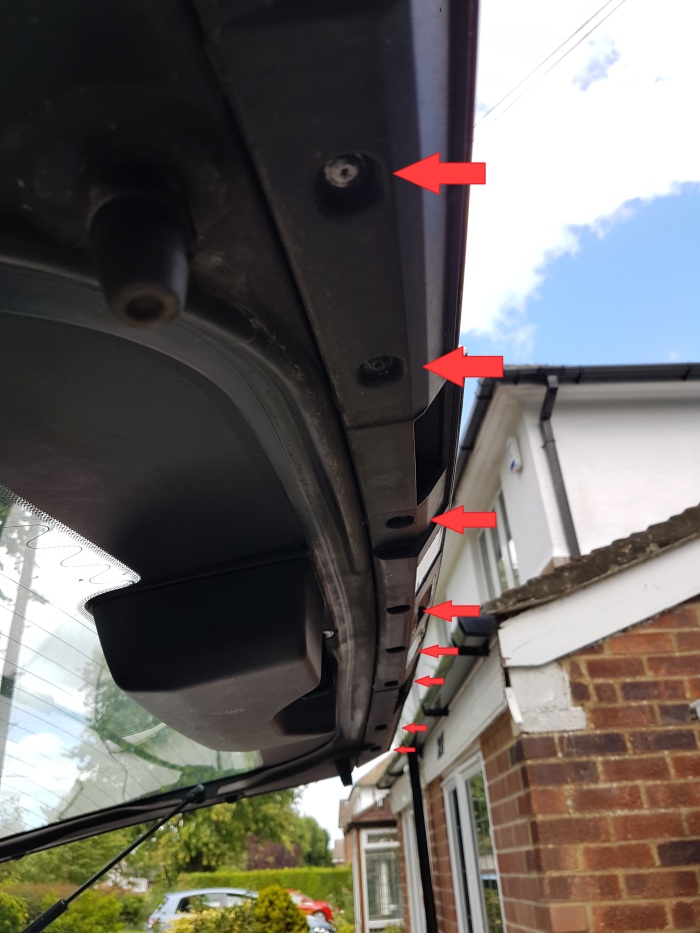
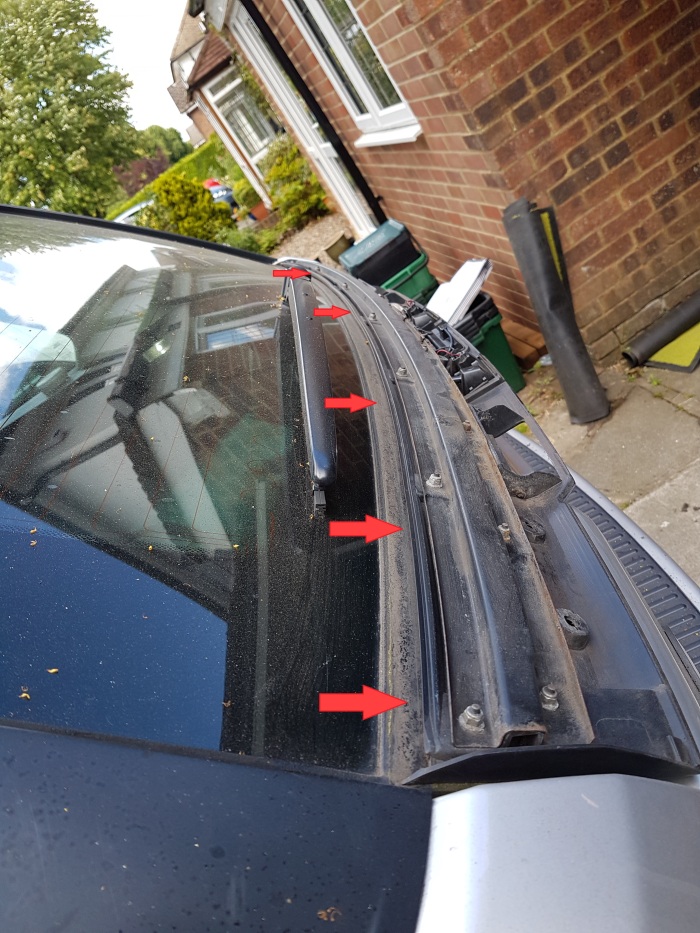
The next day I began with the first step in replacing the switch – Opening the glass section again. Well, that took about 30 minutes, till finally it clicked open. The first step is to remove the 8 * TORX TX20 screws from the underside of the glass boot section.
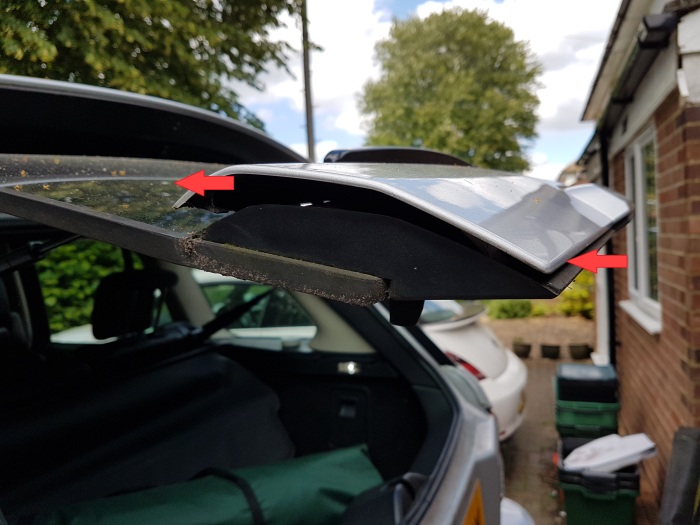
With the screws removed, the body panel can be removed. This is a simple brute force and ignorance step (well it was for me). Pushing both at the bottom of the panel up towards the window as well as pushing the top of the panel towards to window until the top edge comes free of the lip it was behind as well as the bottom corner “lug” coming free. To remove it completely I repeated this step at the other end to ensure both lugs were freed before working my way along sliding it all up until it came loose.
With the panel removed, I spent the next few minutes removing all the dirt and rust that had accumulated over the 14 years of the car’s life. Next, remove the old switch by simply pressing the plastic locking clips in and pushing it out of the housing. The electrical connection is a push-fit with a release catch.

Installation of the new switch is the reverse and again very simple. Feed the electrical connection up through the cutout and reconnect. Then feed the switch up and clip into place ensuring both plastic clips either side lock into place – don’t forget this is an OEM unit so the tolerances were slightly out and needed a tiny trim with a scalpel.
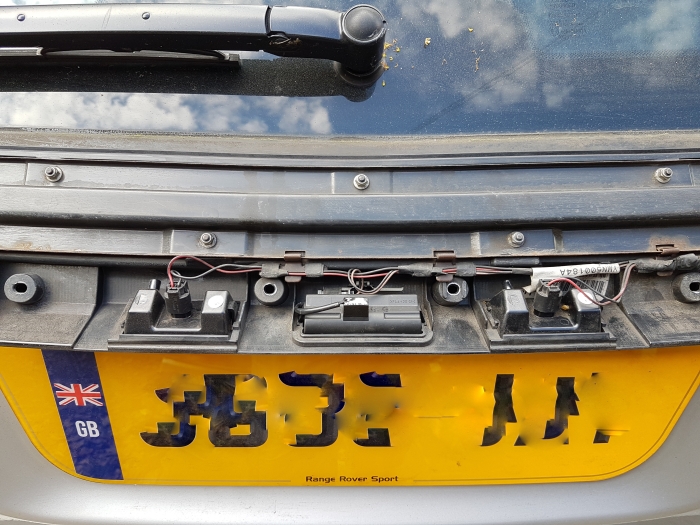
While you have the body panel removed, it’s a great opportunity to change the number plate lights to LED units – mainly because the OEM units I had never fitted 100% and with the body panel removed I could see their tolerances were also slightly out (trimming of some edges with the trusty scalpel again).
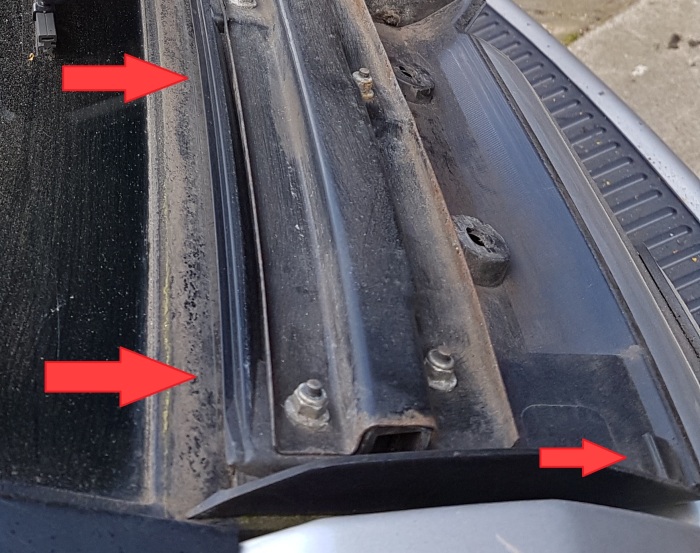
Also, it’s worth cleaning out the gully that the top of the body panel clips in to. Mine was full of mud and light rust. I didn’t both to use anything more that a hard brush.
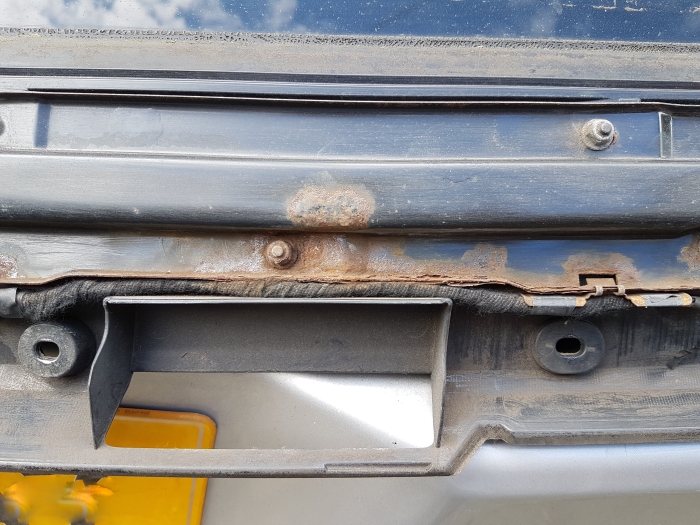
As others have experienced, sometimes the issues are a little bit more complex. You can see from the picture below that the metalwork is prone to rusting under the body panel and mechanical rubbing could short the wires – most likely if one or more number plate lights are also dead then this could indicate a wiring issue which was cause (2) above. I didn’t have to look into a broken connection up at the hinge so can’t help with that bit which was cause (3) above. If I had time I’d get rid of as much rust and then seal the entire inside with Hammerite.
Replacing the body panel is the same as removal just in reverse. Line up one end to make sure the bottom lug catches in the boot section and the front lips catches the top gully, then work your way along to about the middle before moving to the other end and repeating. A second person comes in handy to stop the other end popping out. Once lined up press the panel fully back into the gully and look underneath to check the screw holes align.
The last part is just to reinstall the 8x TORX screws to secure the body panel and a quick clean up. I’m just thankful it was a broken switch and not the wiring.

You must be logged in to post a comment.